Kitchen Cabinet Painting: How to Update Your Cabinets Without Replacing Them
The Smartest Kitchen Upgrade Most People Skip
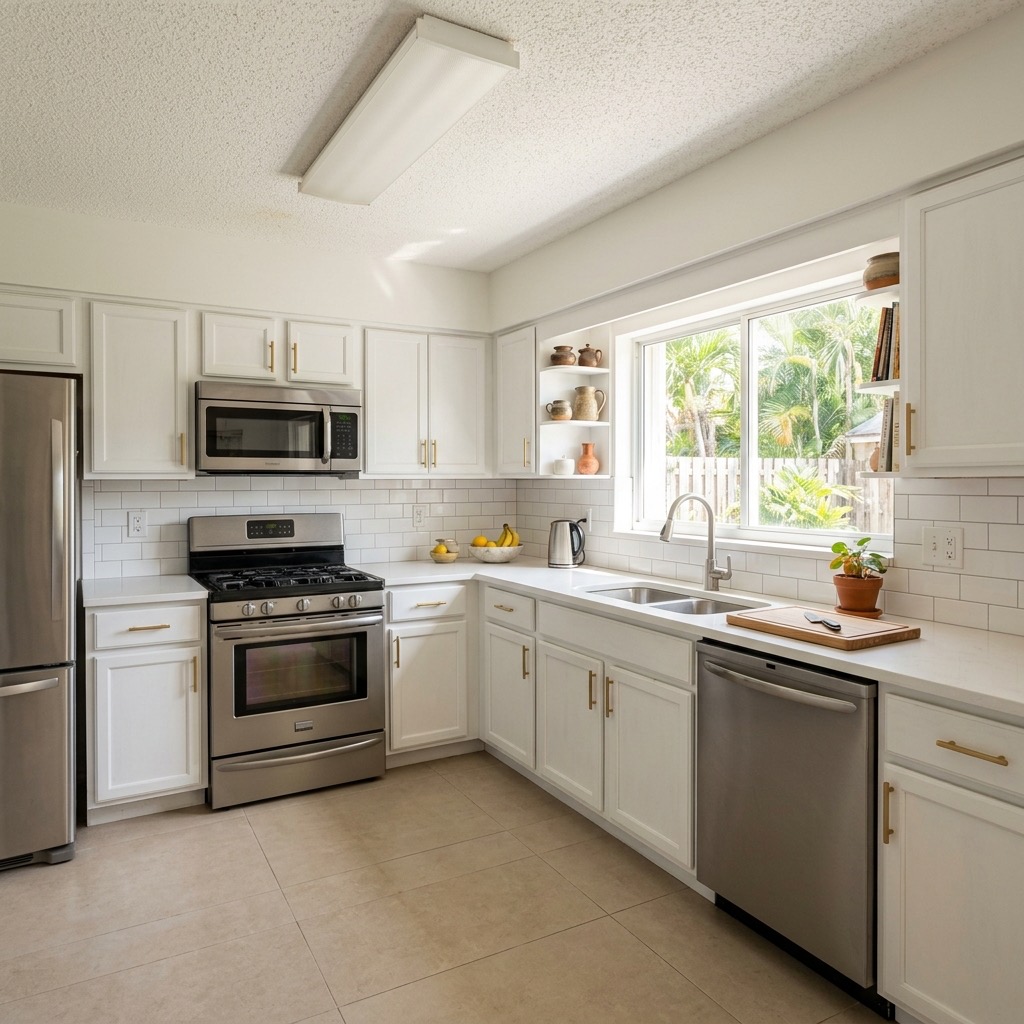
Walk into a kitchen that feels dated and your eye goes straight to the cabinets. They take up the most visual space. They set the tone for the whole room. And most homeowners assume the only fix is ripping them out and starting over.
That is a $15,000 to $30,000 mistake.
If your cabinet boxes are solid and the layout works, painting them gives you a completely different kitchen for a fraction of that cost. We are talking $3,000 to $6,000 for a standard kitchen. Same bones. Totally different feel.
We have done this on dozens of kitchens across Miami-Dade. Kendall, Doral, Palmetto Bay, The Hammocks. Every time, the homeowner says the same thing: "I should have done this years ago."
What Cabinet Painting Actually Looks Like
This is not a weekend DIY project with a roller and a can of paint from the hardware store. Professional cabinet painting is a multi-step process, and every step matters.
Here is how we do it:
Step 1: Door and Drawer Removal
Every door, drawer front, and piece of hardware comes off. We label everything so it goes back exactly where it belongs. Hinges, pulls, knobs, all of it gets removed and cataloged.
Step 2: Cleaning and Degreasing
Kitchen cabinets collect years of grease, cooking oils, and grime. Especially around the stove and above the microwave. If you paint over that, the paint will not stick. Period.
We use a TSP (trisodium phosphate) wash or a heavy-duty degreaser on every surface. This is the step most DIY projects skip, and it is the number one reason DIY cabinet paint jobs peel within a year.
Step 3: Sanding
Every surface gets scuffed with 120 to 150 grit sandpaper. This gives the primer something to grip. We are not sanding down to bare wood. Just creating a surface profile that accepts paint.
For cabinets with a factory lacquer or polyurethane finish, this step is especially critical. That slick factory finish will reject primer if you do not break the surface.
Step 4: Filling and Repair
Dings, dents, and small holes get filled with wood filler. Seams and joints get caulked. If a door has minor damage, this is when we fix it. The goal is a smooth, uniform surface before any primer goes on.
Step 5: Priming
We use a bonding primer designed for slick surfaces. Something like Stix or BIN shellac-based primer. This is the foundation of the entire job. Cheap primer means the whole job fails in two years.
Every door gets primed on both sides. Cabinet boxes, face frames, and end panels all get primed too.
Step 6: Painting (2 to 3 Coats)
Here is where it comes together. We apply two to three coats of cabinet-grade paint, allowing proper dry time between each coat. No shortcuts.
For the best finish, doors and drawer fronts get sprayed. Cabinet boxes and face frames get a combination of spray and brush work depending on the kitchen. Spraying gives you that smooth, factory-like finish that brushes and rollers cannot match.
Step 7: Reassembly and Hardware
Once everything is cured (not just dry, but fully cured), we reinstall all doors, drawers, and hardware. Hinges get adjusted. Doors get aligned. Everything gets a final inspection.
The whole process takes 5 to 7 days for a standard kitchen. Some of that is dry time between coats.
What It Costs in Miami
Here is the real pricing for cabinet painting in the Miami-Dade area in 2026:
Small Kitchen (under 15 doors and drawer fronts)
$3,000 to $4,500
Standard Kitchen (15 to 25 doors and drawer fronts)
$4,000 to $6,000
Large Kitchen (25+ doors and drawer fronts, island, pantry)
$5,500 to $8,000
Compare that to new cabinets:
Stock cabinets (builder grade): $8,000 to $15,000 installed
Semi-custom cabinets: $15,000 to $25,000 installed
Custom cabinets: $25,000 to $45,000+ installed
Cabinet painting saves you 70% to 85% compared to replacement. And you keep the same layout, which means no countertop replacement, no plumbing disconnection, no weeks of living without a kitchen.
For a full breakdown of kitchen project costs, check our kitchen remodeling cost guide.
Best Paints for Miami's Humidity
Miami is tough on paint. Humidity sits at 70% or higher most of the year. Kitchens add steam and moisture on top of that. You need paint that can handle it.
Here is what works:
Alkyd Hybrid Paints
These are the gold standard for cabinets in South Florida. Benjamin Moore Advance and Sherwin-Williams Emerald Urethane Trim Enamel are the two we use most. They are water-based (easy cleanup, low odor) but they cure to a hard, durable finish that resists moisture, grease, and fingerprints.
Alkyd hybrids level out beautifully, so you get fewer brush marks. They take longer to fully cure (about 30 days to reach full hardness), but the result is worth the wait.
Cabinet-Grade Acrylic Latex
For homeowners who want a faster cure time, a high-quality acrylic latex designed for cabinets works well. Behr Alkyd Semi-Gloss and PPG Breakthrough are solid options. These cure faster than alkyd hybrids but may not be quite as durable over 10 years.
What to Avoid
Standard wall paint. Latex flat or eggshell paint has no business on kitchen cabinets. It is too soft, scratches easily, and absorbs grease. We have seen homeowners try this and regret it within six months.
Also avoid oil-based paints. They yellow over time, especially on white cabinets. And in Miami's heat, the yellowing happens faster.
Sheen Matters
Semi-gloss is the standard for cabinets. It is easy to clean, resists moisture, and shows off the color well. Satin works too if you want something slightly less shiny. Never use flat or matte on cabinets.
Color Trends for 2026
Color choices for kitchen cabinets have shifted over the last few years. Here is what we are seeing across Miami kitchens right now:
White and off-white: still the number one choice. About 60% of the cabinet painting jobs we do are white. Benjamin Moore White Dove, Chantilly Lace, and Simply White are the most popular. White opens up kitchens and works with every countertop material.
Sage green and soft greens. This has been growing steadily. It brings a calm, natural feel without being trendy. Works especially well in kitchens with natural stone countertops and wood accents.
Navy blue. A bold choice that pays off on islands or lower cabinets in a two-tone layout. The upper cabinets stay white, the lower cabinets go navy. It adds depth without making the kitchen feel dark.
Warm grays and greige. The cool gray trend is fading. Homeowners are moving toward warmer grays with beige or taupe undertones. Sherwin-Williams Agreeable Gray and Benjamin Moore Revere Pewter are popular picks.
Two-tone combinations. More homeowners are painting upper and lower cabinets different colors. White uppers with a colored lower cabinet or island. This adds visual interest and makes the kitchen feel custom.
When to Paint vs When to Replace
Cabinet painting is not always the right call. Here is how to decide:
Paint Your Cabinets When:
- The cabinet boxes are solid and square
- The layout works for your needs
- Doors close properly and drawers slide well
- You want a color change or updated look
- Your budget is under $8,000
- You do not want to tear apart your kitchen for weeks
Replace Your Cabinets When:
- Boxes are warped, water-damaged, or falling apart
- Drawer slides are broken and the boxes are damaged
- You need a completely different layout
- You are changing the footprint of your kitchen
- The cabinet material is particleboard that is swelling from humidity
- You want soft-close hinges and modern drawer systems (though these can sometimes be retrofitted)
If you are in between, cabinet refacing is a middle-ground option worth considering.
For a deeper dive into the full cabinet painting process and what to expect, see our kitchen cabinet painting guide.
The Hardware Swap: Small Money, Big Impact
While your cabinet doors are off getting painted, it is the perfect time to upgrade your hardware. New pulls and handles change the entire look of a kitchen.
Budget hardware (basic brushed nickel or matte black): $3 to $5 per piece. For a 20-door kitchen, that is $100 to $200.
Mid-range hardware (solid brass, ceramic, or designer styles): $8 to $15 per piece. That is $200 to $400.
Premium hardware (artisan, unlacquered brass, specialty): $15 to $30 per piece. That is $400 to $800.
Most homeowners land in the $200 to $500 range and are shocked at how much it transforms the cabinets. Going from dated oak knobs to sleek matte black bar pulls makes the kitchen feel like a different room.
How Long Does Cabinet Paint Last?
Professionally painted cabinets last 7 to 10 years with normal use. Some go longer. It depends on three things:
Prep quality. This is the biggest factor. Proper cleaning, sanding, and priming determine whether the paint bonds correctly. Shortcuts here cut the lifespan in half.
Paint quality. Cabinet-grade paint costs more for a reason. It cures harder, resists chipping, and holds up to daily wear. Cheap paint fails faster.
Daily use. Cabinets around the stove and sink take the most abuse. The doors you open 20 times a day will show wear first. That is normal. Touch-ups are easy when you keep leftover paint.
After 7 to 10 years, a light sand and fresh coat extends the life for another cycle. It is maintenance, not a full redo.
DIY vs Hiring a Team: Real Talk
Can you paint your own cabinets? Yes. Should you? That depends on how honest you are about your skills and patience.
What Goes Wrong With DIY Cabinet Painting
Peeling within a year. Usually from skipping the degreasing step or using the wrong primer. Once it starts peeling, you have to strip everything and start over.
Brush marks and roller texture. Without a sprayer and experience, you get visible texture on every door. It screams "DIY job" and is very hard to fix.
Doors that stick together. If you stack doors before they are fully cured, they stick and rip the finish. Now you are re-sanding and repainting.
Uneven coverage. Getting smooth, even coverage on 20 to 30 doors is harder than it sounds. Drips, sags, and thin spots show up on every surface.
It takes forever. A project you think will take a weekend turns into three weeks of your kitchen torn apart, doors stacked in the garage, and takeout every night.
What a Professional Team Brings
We have the spray equipment, the workspace, and the process dialed in. Doors get sprayed in a controlled environment. Dry time is managed. Every door gets inspected before reinstallation.
The finish looks factory-quality. The job is done in 5 to 7 days. And if anything is not right, we fix it.
Is it more expensive than DIY? Yes. Is it worth it? Every homeowner who has tried DIY first and then called us says yes.
Pair It With Other Kitchen Updates
Cabinet painting works great on its own. But if you want to maximize the impact, combine it with one or two other updates:
New countertops. Painted cabinets with a fresh quartz or granite countertop makes the kitchen look completely new. Check out our guide to the best countertops for Miami kitchens.
Updated backsplash. A simple subway tile or modern large-format tile backsplash ties the whole look together.
New lighting. Under-cabinet LED strips and updated pendant lights over the island make a huge difference.
Fresh paint on walls. While you are at it, a fresh coat on the kitchen walls completes the transformation.
These add-ons keep the total well under what new cabinets alone would cost, and the result looks like a full kitchen remodel.
Get a Free Cabinet Painting Estimate
We do cabinet painting across Miami-Dade County. Kendall, West Kendall, Palmetto Bay, Doral, Pinecrest, Coral Gables, Sweetwater, The Hammocks, and everywhere in between.
Call us at (786) 363-7039 or send a message to get a free estimate. We will come look at your cabinets, talk through colors and options, and give you a clear price with no surprises.
Your kitchen is closer to a full transformation than you think. And it costs a lot less than you expect.
Ready to start your Miami remodel?
Free in-home estimate. We respond within 15 minutes.